Restorative Yoga - How To Release Stress and Tension By Letting It Go
Yoga is one of the best ways to rejuvenate and relax the mind as well as to lengthen and strengthen the body. And Restorative Yoga is one of the best yoga styles for such. We invited UK-based yoga teacher, the lovely Clive Fogleman of Hello Yoga and Fair Yoga Institute (FYI), to share with us everything we need to know about Restorative Yoga.
 "Restorative yoga is a wonderful practice for relaxing and reducing stress in the body," Clive tells us. "With the assistance of props, postures are passively held for several minutes to encourage the body to open up. As a result, the gaze can move inwards to become more aware of habitual tensions created in our bodies and minds. Restorative yoga is a gentle practice that heals, replenishes and harnesses inner calmness. It often includes guided meditations, and visualisations which can further support relaxation. Many of us live with a sense of having to fulfil commitments, be it on a personal, family, social or professional level. We might spend a lot of time meeting the needs of others. Restorative Yoga is an opportunity to create space for ourselves and to carve out our own little oasis. Whether it is for five minutes or ninety minutes, whether it is every day or just one day per week, restorative yoga, with its emphasis on slowing down and passivity, offers an opportunity to stop and check-in. It is an opportunity for ‘me time’, during which we can let go of whatever we think we need to be doing. It is about letting time stretch out and practising self-care.
  Restorative yoga poses are typically supported with yoga props but can just as easily be supported with various things we might have around the house. By holding postures for anything from one minute to as much as 10 minutes (time for each pose will vary on each individual), this encourages deep layers of the body to let go of tension. Poses are often held with relaxed musculature to encourage fascia (connective tissue), surrounding bones, muscles, ligaments and tendons, to ease and open. This facilitates a deep release in tight areas of the body, expands flexibility and aids healing while loosening energetic blockages and increasing energy flow. With a focus on recovery and restoration, restorative yoga can also compliment a dynamic yoga practice or other physical activities."
 "Restorative yoga gives us the opportunity to ground in the present moment," says Clive. "It helps to slow the mind and be more present in the ‘felt’ experience, all of the different sensations we might be feeling in any given moment. Many of us maintain an external gaze, which often keeps us busy and chasing time. This can also keep us in a ‘heady space’ which might make us feel less centred. Restorative Yoga helps to direct the gaze inwards and connect with our more subtle voices, such as those of the heart and intuition. Even though these voices can be more challenging to connect with, they can help generate a greater sense of awareness and connection to the ‘here and now’. For those who live quite dynamically as a result of work, personal commitments or other forms of physical activity, restorative yoga facilitates balance. Instead of pushing ourselves, we take a step away from the edge to a softer and gentler space. Rather than exerting energy outwards, it is an opportunity to consolidate energy from within. Restorative yoga is a practice that helps to cultivate an approach that ‘less is more’, where we create spaces for renewal which allow us to give more in other areas of our lives.
  Restorative yoga also teaches us to cultivate acceptance and a feeling of letting go. Gradually, we can learn to surrender control and the need to be ‘doing’. Often when we encounter this space we might feel guilty that we should be doing something else; working harder, doing outstanding chores, catching up with correspondence. It might even feel selfish or indulgent, but it isn’t. Life is difficult and challenging. It is physically, emotionally and psychologically exhausting. We need to look after ourselves, to nurture our bodies and be confident that we are not letting others down in the process. If we don’t find this space, we might feel we are at the tipping point, barely getting through the days, always concerned that the next thing might push us over the edge. Creating space for restorative yoga is a chance for deep replenishment and nourishment. Restorative yoga can also help to balance our nervous system, which consists of the sympathetic and parasympathetic systems. The sympathetic system pumps us up and is the initiator of our stress response. The parasympathetic system calms the body and is the initiator of our relaxation response. In a healthy system, these two halves of our autonomic nervous system typically turn off and on habitually in response to life events. In today’s world, most of us have an overstimulated sympathetic nervous system which can significantly impact our health and balance. A consistent restorative practice can help to stimulate the parasympathetic nervous system, gradually helping to rebalance our bodies and support our overall well-being."
 We asked Clive to give us some of his favourite Restorative Yoga poses with tips to try out. Before trying any of these postures, make sure to consult with a yoga teacher or doctor regarding any injuries you have and to discuss any potential contraindications. General tips for Restorative Yoga poses:
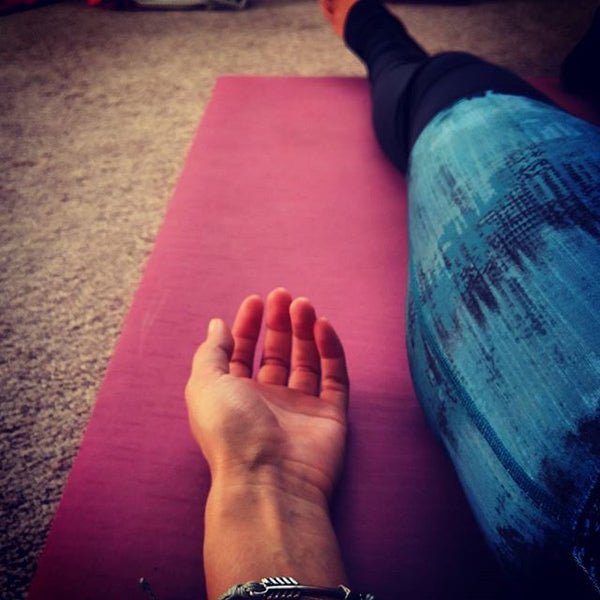
 Lie on the floor with your legs extended out. Place your arms by the side of the body, palms facing up. Bring awareness to your breath, invite yourself into a few minutes of rest. Hold for as long as you want. Tips:
 Sit on your heels with your toes together and knees as wide as feels comfortable. If your hips are tight you can also place a folded blanket between your sit-bones and heels. Place a bolster (or long firm cushion) vertically on the floor just in front of you. Fold forward to rest your belly on the bolster. Rest on one side of your head, and then at the halfway point, turn your head to the other side. Hold for up to five minutes. When you are ready to come up, walk your hands down the mat and gently roll up through the spine. It can be nice to extend your legs after this pose. Tips:
 Lie down on your right side with a folded blanket (folded quite a few times) under your head. Extend your right arm away from you. Place a bolster/firm cushion in front of your upper body. Rest your left thigh on the bolster/ cushion. Place a block or another folded blanket just beside the bolster, so that your left hand can release on to it. Hold for as long as you want. Repeat on both sides if appropriate. Tips:
 Lie down with your back on the mat and your legs extended. Keeping your tailbone and your pelvis grounded, slowly tuck your knees into chest. Wrap your arms around the knees. Hold for as long as feels comfortable. To come out, roll on to your side. If you are coming to your right side, rest the head on the right upper arm with the knees roughly in line with your waist. Tips:
 Lie on the floor with the knees bent, feet approximately hip distance and in line with the knees. Take the right ankle to the left knee. Gently lift the left leg so that the calf is roughly parallel to the floor. Interlace the hands around the left thigh (or knee). Gently draw the left thigh into the body as the right elbow encourages the right thigh away from the body. Hold for one minute and switch over. Tips:
 This is a reclining position on the mat (floor). Begin by sitting on the mat and place a bolster (or long firm cushion) behind you (vertically) with one end of the bolster up against the body. Bend your knees and drop them out to the side, bringing the soles of your feet together (you can also cross your legs, or extend them out in front of you). Gently recline over the bolster. Your arms can be by your side in a t-shape or v-shape with your palms facing up. Hold for up to 5 minutes. To come out, bend your knees, plant the feet down and roll gently off the bolster on to your side. If you are coming to your right side, rest the head on the right upper arm with the knees roughly in line with the waist. Tips:
 From a seated position, position a bolster (or long firm cushion) in the middle of your mat. Bring your right hip next to the bolster with your knees bent. Gently rotate your body so it is facing the bolster and then slowly walk the hands down the mat to release the body on to the bolster. Your head can either be turned towards your knees or for a deeper twist, away from them. Hold for up to two minutes. To ease out, slowly walk the hands up the mat to give yourself some leverage to support bringing the body up. Repeat on the other side. Tips:
 Move your mat or a blanket to a wall. Sit with your left hip bone by the wall and then swing your feet up the wall. Use your elbows to shift your sit-bones closer to the wall. You can position your arms out in t-shape or v-shape. Hold for as long as feels comfortable. Tips:
 Restorative yoga usually goes hand-in-hand with props, as they support us in poses and make us more comfortable while in them. Here is a list of items you can use as props for your Restorative Yoga session: -
 Yoga blocks or bricks are great for modifying almost any yoga pose and for sitting, lying or leaning on in Restorative Yoga to make you more comfortable. You can get the standard ones for less than £5 on Amazon
 . Books, sturdy boxes or stools that we may have in the house can also serve as yoga blocks.

 Yoga straps are not only for helping you reach your toes. There are so many uses to get you comfortable in Restorative Yoga poses. You can make a make-shift yoga strap from old sheets or towels, or even a belt. Otherwise, Amazon have them for around £4
 .
.
 You can do so many things in yoga with blankets. You can sit on them, lay on them, roll them up and use them as bolsters, or put them on top of you to keep you nice and cosy in Savasana (Corpse Pose).
 Pillows can also serve as bolsters in yoga and the good thing is that we might have loads of pillows lying around the house. Position them under your knees to alleviate pressure in poses on your back, rest your head on them, or stack them up and lean on them for a super restorative experience.

 by Michael Heatherington.
  £5.68 from Amazon. 2. Reduce stress, gain energy and find balance with this book by yoga instructor Ulrica Norberg
 on Restorative Yoga.
  £9.99 from Amazon. 3. Yoga Journal Presents Restorative Yoga for Life: A Relaxing Way to De-stress, Re-energize, and Find Balance by yoga instructor Gail Boorstein Grossman.
  £16.99 from Amazon
 Clive Fogelman lives in London and currently works as a yoga and meditation teacher. He is also a qualified Group Work Practitioner with the Institute of Group Analysis (IGA). Clive is also co-founder of the Fair Yoga Institute (FYI) an organisation that is dedicated to providing support and care to yoga teachers. For more information on Clive, visit www.helloyoga.co.uk where you can also read about the Life Sequence, a unique experience that Clive has created which takes people on a journey from birth to death combining yoga, embodiment, creative expression, meditation and guided visualisations. You can also follow him on Facebook and Twitter.
Why Choose Restorative Yoga
"Restorative yoga is a wonderful practice for relaxing and reducing stress in the body," Clive tells us. "With the assistance of props, postures are passively held for several minutes to encourage the body to open up. As a result, the gaze can move inwards to become more aware of habitual tensions created in our bodies and minds. Restorative yoga is a gentle practice that heals, replenishes and harnesses inner calmness. It often includes guided meditations, and visualisations which can further support relaxation. Many of us live with a sense of having to fulfil commitments, be it on a personal, family, social or professional level. We might spend a lot of time meeting the needs of others. Restorative Yoga is an opportunity to create space for ourselves and to carve out our own little oasis. Whether it is for five minutes or ninety minutes, whether it is every day or just one day per week, restorative yoga, with its emphasis on slowing down and passivity, offers an opportunity to stop and check-in. It is an opportunity for ‘me time’, during which we can let go of whatever we think we need to be doing. It is about letting time stretch out and practising self-care. Restorative yoga poses are typically supported with yoga props but can just as easily be supported with various things we might have around the house. By holding postures for anything from one minute to as much as 10 minutes (time for each pose will vary on each individual), this encourages deep layers of the body to let go of tension. Poses are often held with relaxed musculature to encourage fascia (connective tissue), surrounding bones, muscles, ligaments and tendons, to ease and open. This facilitates a deep release in tight areas of the body, expands flexibility and aids healing while loosening energetic blockages and increasing energy flow. With a focus on recovery and restoration, restorative yoga can also compliment a dynamic yoga practice or other physical activities."
Restorative Yoga Benefits
"Restorative yoga gives us the opportunity to ground in the present moment," says Clive. "It helps to slow the mind and be more present in the ‘felt’ experience, all of the different sensations we might be feeling in any given moment. Many of us maintain an external gaze, which often keeps us busy and chasing time. This can also keep us in a ‘heady space’ which might make us feel less centred. Restorative Yoga helps to direct the gaze inwards and connect with our more subtle voices, such as those of the heart and intuition. Even though these voices can be more challenging to connect with, they can help generate a greater sense of awareness and connection to the ‘here and now’. For those who live quite dynamically as a result of work, personal commitments or other forms of physical activity, restorative yoga facilitates balance. Instead of pushing ourselves, we take a step away from the edge to a softer and gentler space. Rather than exerting energy outwards, it is an opportunity to consolidate energy from within. Restorative yoga is a practice that helps to cultivate an approach that ‘less is more’, where we create spaces for renewal which allow us to give more in other areas of our lives. Restorative yoga also teaches us to cultivate acceptance and a feeling of letting go. Gradually, we can learn to surrender control and the need to be ‘doing’. Often when we encounter this space we might feel guilty that we should be doing something else; working harder, doing outstanding chores, catching up with correspondence. It might even feel selfish or indulgent, but it isn’t. Life is difficult and challenging. It is physically, emotionally and psychologically exhausting. We need to look after ourselves, to nurture our bodies and be confident that we are not letting others down in the process. If we don’t find this space, we might feel we are at the tipping point, barely getting through the days, always concerned that the next thing might push us over the edge. Creating space for restorative yoga is a chance for deep replenishment and nourishment. Restorative yoga can also help to balance our nervous system, which consists of the sympathetic and parasympathetic systems. The sympathetic system pumps us up and is the initiator of our stress response. The parasympathetic system calms the body and is the initiator of our relaxation response. In a healthy system, these two halves of our autonomic nervous system typically turn off and on habitually in response to life events. In today’s world, most of us have an overstimulated sympathetic nervous system which can significantly impact our health and balance. A consistent restorative practice can help to stimulate the parasympathetic nervous system, gradually helping to rebalance our bodies and support our overall well-being."
Restorative Yoga Poses
We asked Clive to give us some of his favourite Restorative Yoga poses with tips to try out. Before trying any of these postures, make sure to consult with a yoga teacher or doctor regarding any injuries you have and to discuss any potential contraindications. General tips for Restorative Yoga poses:
- Listen to the body. If it doesn’t feel right, don’t stay in the posture.
- Allow postures to evolve over time. It can be nice to start in a softer space and feel if the body naturally wants to go deeper.
- Remember to layer up as you will not generate as much heat as in other forms of yoga or exercises.
- Build up how long you stay in a posture over time.
- Approach the process of building the posture and coming out of the posture as an opportunity for nurture and self-care.
- Take a moment as you come into the posture to check in with the body. Minor adjustments can have a significant impact on our capacity to release and relax.
- Take time to ease out of postures. Sometimes the body can feel sensitive in certain areas after holding a posture for a long time.
- Take some time as you come out of each posture. Give the body some time to settle and integrate one experience before moving on to another. Sometimes a posture can continue to echo in the body even once we are out of the posture.
- If your mind wanders while in the posture, focus on the breath or the sensations in your body. Each time you drift off, return to the anchor of your body and your breath.
Savasana
Lie on the floor with your legs extended out. Place your arms by the side of the body, palms facing up. Bring awareness to your breath, invite yourself into a few minutes of rest. Hold for as long as you want. Tips:
- Take a bolster/ cushion underneath the knees to remove any strain from the lower back.
- Cover yourself with a blanket to stay warm and place an eye pillow over the eyes to block out the light.
- As you settle in, scan the body from head to toe inviting different parts of your body to relax as much as possible.
Supported Child’s Pose
Sit on your heels with your toes together and knees as wide as feels comfortable. If your hips are tight you can also place a folded blanket between your sit-bones and heels. Place a bolster (or long firm cushion) vertically on the floor just in front of you. Fold forward to rest your belly on the bolster. Rest on one side of your head, and then at the halfway point, turn your head to the other side. Hold for up to five minutes. When you are ready to come up, walk your hands down the mat and gently roll up through the spine. It can be nice to extend your legs after this pose. Tips:
- For further support place the bolster/ cushion on an incline with a block in the middle of the bolster on its widest side and another block towards the top on its long edge.
- Take a rolled-up blanket under the tops of your feet if they feel tight.
- Place blankets under your forearms for additional support.
Side-resting pose
Lie down on your right side with a folded blanket (folded quite a few times) under your head. Extend your right arm away from you. Place a bolster/firm cushion in front of your upper body. Rest your left thigh on the bolster/ cushion. Place a block or another folded blanket just beside the bolster, so that your left hand can release on to it. Hold for as long as you want. Repeat on both sides if appropriate. Tips:
- If the folded blanket is not high enough under the head, place a block/ firm book with a blanket over it.
- If the bolster feels too high for the thigh, try extending both legs and placing a bolster/cushion vertically in between the legs.
- Place a blanket over the mat/floor for extra comfort on the side of the body.
Resting on front pose
https://instagram.com/p/BEIxE0YwEWf/?taken-by=lots_of_yoga Place a bolster or a cushion horizontally at the bottom of your mat. Position a folded blanket (adjust the height as appropriate) crossways in the centre of your mat. Rest on your front over the blanket so your pelvis is resting on it (the lower edge of the blanket will be roughly at the top of your thighs). Rest the tops of your feet on the bolster. Place your arms in a cactus shape and turn your head to one side. Hold for up to 3 minutes switching over at the halfway point. To come out, bring your hands underneath your shoulders, push up to all fours and release the feet from the bolster. Pause for as long as you need. You can also do this using chairs as shown in the picture. Tips:- If your shoulders or neck feel tense fold your forearms and position your head on your forearms.
- If your shoulders or neck feel tense you can also release your arm by the side of the body (if you are resting on the right side of your head releasing your right arm).
- If the bolster feels too high for the feet, replace with a folded blanket.
Restorative Yoga Sequence For Beginners
Try these five poses together for a wonderful Restorative Yoga Sequence that you can do in 15 minutes or an hour, depending on how much time you have:- Embryo Posture
- Ankle-to-Knee Stretch
- Supported Lower Back Bend with knees out wide
- Supported Twist
- Legs Up The Wall
Embryo Posture
Lie down with your back on the mat and your legs extended. Keeping your tailbone and your pelvis grounded, slowly tuck your knees into chest. Wrap your arms around the knees. Hold for as long as feels comfortable. To come out, roll on to your side. If you are coming to your right side, rest the head on the right upper arm with the knees roughly in line with your waist. Tips:
- If your back is uncomfortable place a blanket on top of your mat.
- If your neck over extends when you wrap your knees in, take a folded blanket underneath your head.
- If it is uncomfortable to have your knees together, hook the ankles and draw the knees out wide.
Ankle to knee stretch
Lie on the floor with the knees bent, feet approximately hip distance and in line with the knees. Take the right ankle to the left knee. Gently lift the left leg so that the calf is roughly parallel to the floor. Interlace the hands around the left thigh (or knee). Gently draw the left thigh into the body as the right elbow encourages the right thigh away from the body. Hold for one minute and switch over. Tips:
- If you feel that your neck overextends as you interlace your hands try a folded blanket underneath your head.
- Instead of interlacing your hands use a yoga strap/belt around the thigh.
- For a softer variation take the ankle to knee, keep the other foot grounded and just gently press on the thigh of the leg you have lifted (you can also do this on a chair).
Supported lower back bend with knees out wide
This is a reclining position on the mat (floor). Begin by sitting on the mat and place a bolster (or long firm cushion) behind you (vertically) with one end of the bolster up against the body. Bend your knees and drop them out to the side, bringing the soles of your feet together (you can also cross your legs, or extend them out in front of you). Gently recline over the bolster. Your arms can be by your side in a t-shape or v-shape with your palms facing up. Hold for up to 5 minutes. To come out, bend your knees, plant the feet down and roll gently off the bolster on to your side. If you are coming to your right side, rest the head on the right upper arm with the knees roughly in line with the waist. Tips:
- For extra support place blocks/ firm cushions underneath the sides of the legs.
- If the bolster creates too much of an extension in the spine, place a block (or folded blanket) underneath your sit bones or use a folded blanket instead of a bolster (creating a similar length to the bolster).
- If you find your neck over extending place a blanket (folded once or twice) underneath your head.
Supported twist
From a seated position, position a bolster (or long firm cushion) in the middle of your mat. Bring your right hip next to the bolster with your knees bent. Gently rotate your body so it is facing the bolster and then slowly walk the hands down the mat to release the body on to the bolster. Your head can either be turned towards your knees or for a deeper twist, away from them. Hold for up to two minutes. To ease out, slowly walk the hands up the mat to give yourself some leverage to support bringing the body up. Repeat on the other side. Tips:
- For extra support put the bolster on a gentle incline using blocks (or a firm book).
- For extra comfort and support place blankets underneath the forearms.
- Place a blanket or block between your knees to support the lower back.
Legs up the wall
Move your mat or a blanket to a wall. Sit with your left hip bone by the wall and then swing your feet up the wall. Use your elbows to shift your sit-bones closer to the wall. You can position your arms out in t-shape or v-shape. Hold for as long as feels comfortable. Tips:
- Fold a blanket underneath your head for extra support.
- Place an eye pillow on the soles of your feet to gently weigh them down and on your eyes to block the light coming in.
- For an alternative you can also place your lower legs on a chair instead of extending them up a wall (with a blanket underneath the lower legs).
Restorative Yoga Props
Restorative yoga usually goes hand-in-hand with props, as they support us in poses and make us more comfortable while in them. Here is a list of items you can use as props for your Restorative Yoga session: -
1. Yoga Blocks or Yoga Bricks
Yoga blocks or bricks are great for modifying almost any yoga pose and for sitting, lying or leaning on in Restorative Yoga to make you more comfortable. You can get the standard ones for less than £5 on Amazon2. Yoga Bolsters
Yoga bolsters are the epitome of comfort in Restorative Yoga. Placing them under your knees or lower back can make a significant difference in several poses. However, they can be quite pricey to buy. Here's a cheap and cheerful yoga bolster for £15 otherwise, here's our guide to making your own yoga bolster in 3 minutes.
3. Yoga strap
Yoga straps are not only for helping you reach your toes. There are so many uses to get you comfortable in Restorative Yoga poses. You can make a make-shift yoga strap from old sheets or towels, or even a belt. Otherwise, Amazon have them for around £44. Blankets
You can do so many things in yoga with blankets. You can sit on them, lay on them, roll them up and use them as bolsters, or put them on top of you to keep you nice and cosy in Savasana (Corpse Pose).
5. Pillows
Pillows can also serve as bolsters in yoga and the good thing is that we might have loads of pillows lying around the house. Position them under your knees to alleviate pressure in poses on your back, rest your head on them, or stack them up and lean on them for a super restorative experience.
Want to learn more about Restorative Yoga but don't know where to start? Here are a few pointers from Lots of Yoga.
Restorative Yoga Books
1. A lovely book on how to do Restorative Yoga: For Home Or In A Class £5.68 from Amazon. 2. Reduce stress, gain energy and find balance with this book by yoga instructor Ulrica Norberg £9.99 from Amazon. 3. Yoga Journal Presents Restorative Yoga for Life: A Relaxing Way to De-stress, Re-energize, and Find Balance by yoga instructor Gail Boorstein Grossman. £16.99 from AmazonRestorative Yoga Videos (Youtube)
Here are some videos we found helpful if you want to do some Restorative Yoga at home.15-Minute Slow Stretch Restorative Yoga Routine with Sarah Beth
30-Minute Restorative Yoga and Meditation with Candace
50-Minute Restorative Yoga Cultural Conditioning Class with Melissa West
To see some of Clive’s and other teachers’ videos on Restorative Yoga, you can visit Movement For Modern Life. Be sure to reference Clive or use his dedicated url when signing up. --------------------------------------------------------------------------------------------------- Clive Fogelman lives in London and currently works as a yoga and meditation teacher. He is also a qualified Group Work Practitioner with the Institute of Group Analysis (IGA). Clive is also co-founder of the Fair Yoga Institute (FYI) an organisation that is dedicated to providing support and care to yoga teachers. For more information on Clive, visit www.helloyoga.co.uk where you can also read about the Life Sequence, a unique experience that Clive has created which takes people on a journey from birth to death combining yoga, embodiment, creative expression, meditation and guided visualisations. You can also follow him on Facebook and Twitter.