Sirsasana - 10 steps to your first yoga Headstand
There's no doubt about it; being able to do Sirsasana (Yoga Headstand) is cool.

What is not so cool, however, is not being able to do one at first (that's how we all started) and getting frustrated or even end up hurting yourself. Let's take this slowly. You don't need to get into a headstand. If it scares you in any way, there is no need to do it. Other inversions such as shoulder stand or legs up the wall do the job just as well. (Read about exactly what "job" inversions do here.) But if you would love to be able to do it and have no idea where to start, here are some of the best tips we have tried.
How to Do a Yoga Headstand: Step-by-step guide to get into Sirsasana
1. Setting yourself up in Child's Pose
From Child's Pose, place your elbows shoulder-width apart on the mat and put your arms horizontally out in front of you with either hand touching the opposite elbow.

Starting your headstand in Child's Pose
Measure your arms, hands to elbows to set up your headstand foundation
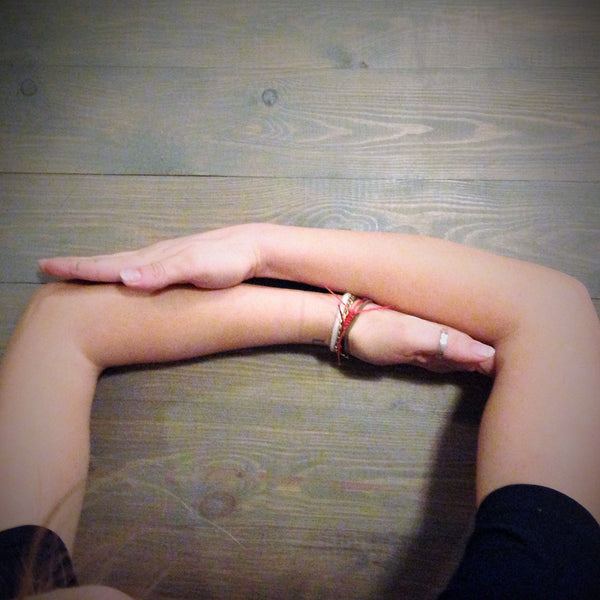
2. Set up your arms for the perfect foundation
Many people put too much emphasis on their head and do not realise that the arms help create a sense of balance and foundation before the lift up. Without moving the elbows from their position, shift the hands upwards till they meet and clasp them together making a nice little bed for your head.

Keep elbows stuck on the mat, shift hands upwards till they meet and clasp them together
3. Positioning the little finger (or not)
There are differing views on whether the little finger should be tucked into the clasped hands.

Clasp hands together making a nice little bed for your head - little finger tucked in recommended but not imperative
Most yoga teachers advise this to avoid the little finger getting in the way or even getting squashed when you are upside down. If you find that your little finger is not in the way and does not bother you, feel free to position it wherever is comfortable for you.
4. Getting the head in the right place
Place your head into the clasped hands. Make sure that there isn't a lot of pressure on the head by pushing up from the shoulders. The weight needs to be on your arms. To check this, see if you can slowly turn your head slightly from side to side.

Place your head into the clasped hands
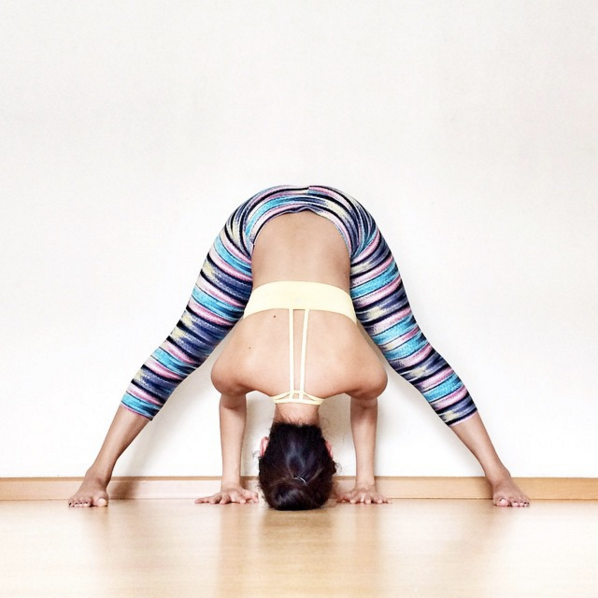
5. Walk towards your head
Straighten your legs just as you would do in downward dog or dolphin pose and start to walk the feet in towards the head with small steps. It is imperative to be warm when attempting headstand because the hamstrings need to be stretched otherwise this point will prove difficult.

Straighten your legs just as in downward dog or dolphin pose
Start to walk the feet in towards the head with small steps
7. How far should you go?
Walk the feet in till the upper body is completely vertical. However, make sure you do not look at a mirror while having the weight of your head up-side-down as you may injure yourself.
Walk the feet in till the upper body is completely vertical
8. The lift-off!
Once the upper body is able to balance like this, use your core to slowly bend your knees and bring them into the chest, slowly lifting the feet off the floor.

Using the core, slowly lift feet off the floor

Bring the knees into the chest
9. Make sure you use your bandhas (core strength)
Slowly start to stretch the legs upwards till you are in an upright position. All the work is done using your core and tightening your abs will make sure the legs stay up.

Option to straighten the legs out in front of you and lift up or raise them up from the bent knees-to-chest position

Lift the legs up slowly using the core at all times to help keep you balanced
10. How to come out safely
Coming out of headstand safely is just as important as getting into it. You want to make sure you don't crash down. Ideally, we want to come down with as much control as we went up. Keeping the core tight and very active, bring the knees back down to the chest and then slowly both feet back onto the ground, and rest back down in Child's pose. If you feel that you are about to come down, bend the knees into the chest and keep the core (abs) tight at all times to keep control. Alternatively, bring one leg down first, knee to chest, and place the foot on the floor, and with control bring the other leg down slowly. If however, you fall the opposite way, the best thing you can do is keep your legs loose, bend the knees, and come down into a bridge position. This may seem scary at first, but it's no scarier than bridge, so don't worry.

(Image via @staceylau)
Summary: Do's and Don'ts when it comes to your first headstand
Do's
- Consult your teacher and find someone you trust to guide you through your first few headstands. 80% of this pose is about overcoming fear and being confident when you are upside down. It's best to start right.
- Get warmed up. Here is a great free yoga class (vinyasa flow) by Lesley Fightmaster which is tailored to prepare the body for headstand.
- Breathe. If your breathing is restricted, it means you are tensing up. Being tense may make headstand harder than what it needs to be, not to mention more injury-prone.
- When moving through each of the above points, it is important to remember the previous point. i.e. when lifting the feet off the floor, we must not forget to keep the pressure on the arms at all times and keep shoulders away from the ears.
- It's all about the upper body. Ignore the legs at first. The most important thing in achieving headstand is getting the upper body into the correct position. Once on your head, the upper body needs to be completely vertical. Being able to balance there is 80% of the work.
- Do use props and modifications (such as walls and chairs, see below) to help you start getting into the pose. It is a lot better to build up the upper body strength first than to force yourself into the pose!
Don'ts
- Do not force yourself. As previously mentioned, yoga is not a competition. There are many other inversion poses that can deliver the same kinds of benefits.
- Do not look around and turn your head while in the position. That can cause injuries and negate the benefits of being in an inversion pose. That is why it's best to start practicing with someone you can trust who can either correct you or at least take photos to show you what you are like when you are upside-down.
- Do not put all the pressure on your head; feel the strength being drawn from your arms, elbows and your upper back and shoulders.
- Do not stand up too quickly after the posture. Given that you have just been upside-down, it's best to let yourself rest in Child's Pose first to prevent dizziness.
- Do not kick up. If your legs don't float up then you do not have the upper body in the correct alignment and will probably end up toppling over. If your legs don't effortlessly come off the ground, then you aren't in headstand correctly. Don't fret though! You can make it using the below headstand modifications.
Practice makes perfect. Keep at it. If this is all still too daunting, we love the following modifications.
6 headstand modifications for you to try
1. Use a wall to walk yourself into a headstand

(Image via @justbrifree)
Set up your mat against a wall and go through the above step-by-step guide. When you walk your legs in towards the head and your bottom has touched the wall, start to send the legs up putting pressure against the wall if you need to. The wall is there for you to feel safe and for you to get used to being in headstand. As with all props, we use them to lose them. Once you feel confident enough with the wall, do the same but this time a foot away from the wall, then two feet, then three, till you feel that you don't need it anymore. If you want to ease yourself slowly away from the wall, try using blocks as pictured above.
2. Modify headstand with a chair
Get a chair and place it at the foot of the mat making sure it's sturdy and won't slip anywhere. Carry out steps 1-4 of the guide above and then, keeping one leg on the floor, lift the other leg onto the chair.

After steps 1-4 of the guide above, lift one leg onto the chair
Even though you have the chair as a prop to help you, still try to lift up the leg using your abs. Then slowly, using the core, lift the other leg onto the chair as well.

Bring both legs onto the chair
You could stay in this position for the whole inversion or you could try to lift the legs up slowly, either together or one by one using your abs. To come down, bring one leg off the chair and then the other, and rest in Child's Pose.
3. Keep knees bent

(Image via @emmy_stroberg)
Lifting the legs off the floor and keeping the knees bent without stretching the legs all the way up is another good way to gain confidence. You can even keep the knees stuck to your chest if you so wish. The main thing to remember is that you lift off the floor using the core, the Uddiyana Bandha, or in plain English, the abdomen.
4. Open your legs

Believe it or not, opening your legs wide whilst walking them in towards your head and lifting them up in an open split (or however far you can split your legs) makes it easier to float up because your legs serve as balancing beams! Try it and see!
5. Keep one knee bent or one leg on the floor

(Image via @jennifer.robancho)
This is a good one for beginners to get the feel of a headstand without the fear of falling because you always have your leg on the floor. Alternate between legs to get the hang of having at least one leg up.
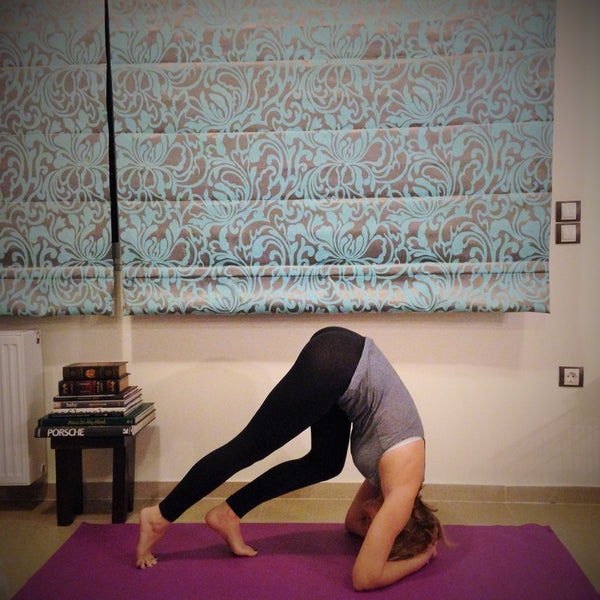
6. How to get into headstand if your hamstrings and shoulders are tight
We're always being told that we shouldn't jump or hop up into headstand but what if your body just isn't getting there, i.e. if the hamstrings are too tight? If you have perpetual tight shoulders, shorter arms or tight hips, you may struggle to walk close enough to the hips for your spine to be perpendicular to the floor so that your legs start lifting up. Here we found a way to walk the feet closer towards your head despite these limitations to prepare the headstand. For this modification, try to extend your head further above your fists, almost as if you are attempting to kiss the front edge of the mat. If you have a regular practice and know what a yoga push up (Chaturanga Dandasana) is, you can mimic the action of the forward motion and lean as forward as your body allows. Taking a breath in between each step can help relax the hamstrings and allow you to walk further towards the head.

If you struggle to walk close enough to the hips for your spine to be perpendicular to the floor, keep the head over and above the fists at first
Once the head is over and above the fists, it creates a wonderful space for your legs and hips so you can walk a lot closer to the head.

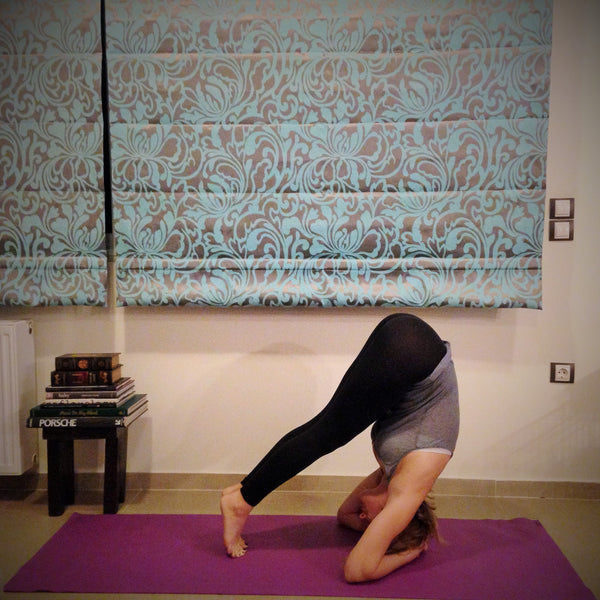
Walk the feet into towards the head as far as they can go

Taking a breath in between each step can help relax the hamstrings allowing you to walk further towards the head
After that, tug the head back into the slot between the fist and the arms.

Once you have walked as far as you can go, you can then tuck the head back into the clasped hands
By doing this, you can feel that your legs are a lot lighter. They may even start lifting up! If you feel that you need to start building the confidence to your first headstand, you can start experimenting against the wall (with your back facing the wall with about 10 inches distance). That way, you can use your bottom or tippy toes to help with your balance while being upside down. In time, these modifications will help condition your upper body, head and arms and set you ready for the lift off!
Still feel you need help? Try the FeetUp headstand stool !
!
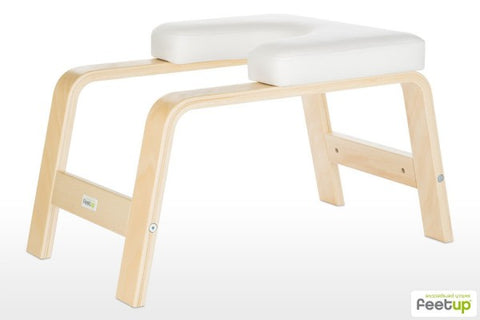
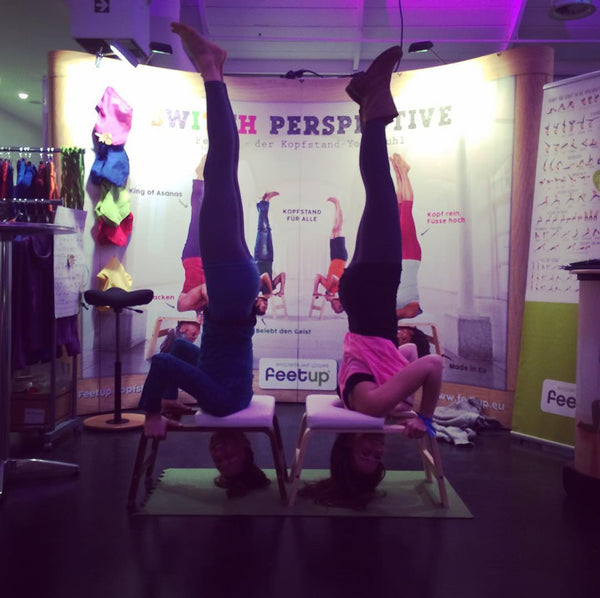
FeetUp Headstand Stool
We tried the FeetUp once and were converted! It's £99 from Amazon but if you feel that you just can't get into Sirsasana no matter how hard you try, this is sure to get you there! Take a look at the gallery of FeetUp-ers who love it.


Do you have any other headstand tricks you'd like to share with us? Please comment below, or send us photos by tweeting at @lotsofyoga or tag us on instagram (@lots_of_yoga) and we may feature your photos and the link to your social media accounts/websites onto our platforms!
Follow us for more free, high-quality yoga and mindfulness content... and subscribe to our mailing list below!
Don't forget to connect with us on social media (Facebook, Twitter, Instagram, Pinterest and Tumblr).
Also in Yoga Poses