Yoga Over 50 - 14 Yoga Poses That You Can Do At Any Age
It's never too late to start a new activity, and that includes doing yoga over 50. If you want to start getting fit, yoga is a great way to go. It has many benefits both physical and mental, it is for every body type, and you can do it at any age.
Yoga For Over 50 - Fitness Levels

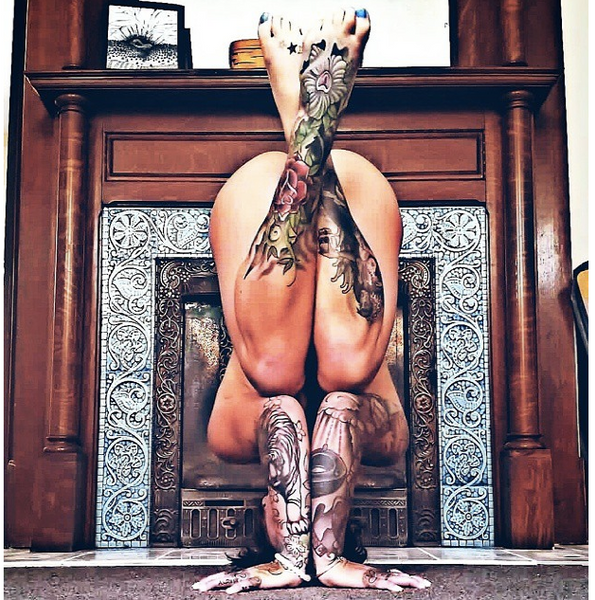
(Image via @lorrainecladish)
Whether you are 5, 50 or 105, how much you can do depends of your level of fitness. There are 3 basic levels.
- Not active - If you've never really worked out and you want to start now, that's absolutely fine. Well done for wanting to take this step.
- Fairly active - You might not live at the gym, but you consider yourself active, whether it's running around with your busy day to day life or squeezing in a workout here and there.
- Very active - You always manage to get your workout in regardless of how busy you are, whether it's taking the stairs instead of the lift, you are always active. Bravo!
Yoga Over 50 - 14 Yoga Poses With Variations For Every Fitness Level

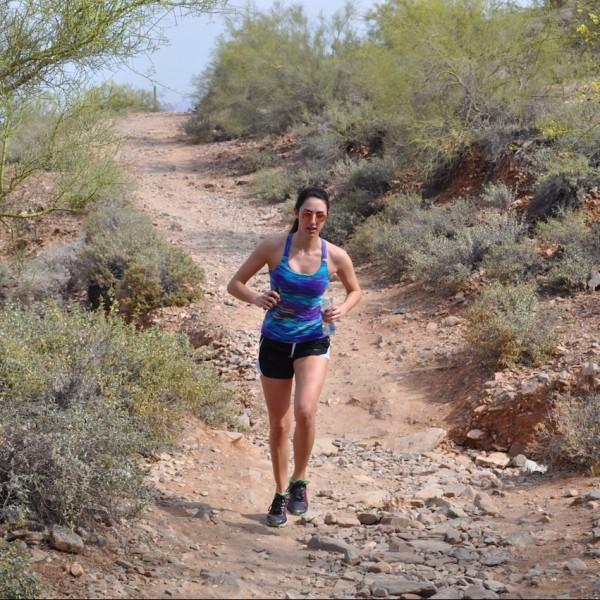
(Image via @clairenorgate)
Proving that age is nothing but a number, here are 14 yoga poses that you can do at any age, with three variations of each to cater to your level of fitness.
1. Downward Facing Dog (Adho Mukha Svanasana)
Downward Dog's benefits include opening of the shoulders and the chest, as well as stretching the hamstrings and spine. From a kneeling position on hands and knees, step on the toes keeping the hands and feet securely in place, lifting the bum all the way up towards the ceiling, aiming to gently push the head towards the knees, creating an upside-down V shape. Hands should be shoulder-distance apart, feet hip-distance apart and the gaze between the thighs or at the navel.

Level 1. Place your hands on the back of a chair and try to get your head past the forearms to get a maximum stretch in the shoulders.
Level 2. Use the seat of a chair to get further towards the ground. Bend the knees to relieve tension in the hamstrings.
Level 3. Place hands shoulder distance apart on the mat, and feet hip distance apart, push through the hands and feet, while opening the chest and head towards the floor.
2. Seated Forward Bend (Paschimottanasana)
The Seated Forward Bend stretches the hamstrings and the spine and can relieve pressure in the lower back and back pain in general. From a seated position, stretch out the legs in front of you, keeping the back as straight as possible, hinge forwards from the hips, trying not to round the back, as far as you can go, and holding the pose there.

Level 1. Sit on the edge of a chair and bend forward at the hips, keeping the spine straight.
Level 2. Wrap a strap around the feet and hold onto it while gently pulling yourself forward keeping the spine as straight as possible.
Level 3. With the legs stretched out in front of you, fold forwards bending at the hips and hold on to the feet, with a slight bend in the knees to relieve any tension in the hamstrings.
3. Triangle Pose (Trikonasana)
Triangle Pose provides a deep stretch in the hamstrings, the side body and spine and opens up the chest and shoulders. From standing, take a big step back, keeping feet on either side of an imaginary line, the front foot facing forwards and the back foot angled inwards at 45 degrees. Raise the arms out by the side, lean the upper body forward over the front leg, and twist the torso so that the front hand comes down to meet the front foot, and the other hand is raised to the sky, keeping the gaze on the upper hand.

Level 1. From standing, take a big step backwards and hold on to the back of a chair with one hand, raising the other hand and upper body towards the sky.
Level 2. Leaning on the chair seat, twist the upper body and upper hand towards the sky.
Level 3. Trying to keep the upper body and pelvis tucked in, bend the upper body down towards the foot whilst rotating the upper body upwards and gaze towards the sky.
4. Warrior II Pose (Virabhadrasana II)
Warrior II works out the core, the thighs and the whole of the legs, opens up the shoulders and tones up the buttocks. From standing, take a big step back, keeping feet on either side of an imaginary line, the front foot facing forwards and the back foot angled inwards at 45 degrees. Bend the front knee so that the knee is directly above the ankle. Raise the arms out by the side, and face forwards, gazing over the front arm.

Level 1. Sit on a chair sideways so that your front leg is over the chair and the back leg is on the floor, foot turned in at a 45-degree angle. Raise the hands up so they are parallel to the floor and gaze forwards.
Level 2. With this variation, you can keep the back knee on the floor or on a block, keeping the front knee directly over the ankle.
Level 3. Keep your weight distributed evenly between the back and front legs, keep the front knee over the ankle and body straight, facing forwards.
5. Tree Pose (Vrksasana)
Tree Pose is all about balance. starting with both feet firmly rooted on the ground, lift one leg up and bring it to rest as high as possible on the other leg. Bring both hands to the chest in namaste, and when you feel comfortable, lift the arms above the head. To help balance in this pose, it greatly helps to find a stationary focal point somewhere in front of you and gaze at it intently.

Level 1. Lean on the back of a chair with one hand, and rest one foot on the calf of the opposite leg.
Level 2. Just as in the Level 1 variation, lean on the back of a chair with one hand, but rest the one foot on the inner thigh of the other leg.
Level 3. Bring one foot to the inner thigh of the opposite leg, and try to bring the hands to the chest at Namaste.
6. Revolved Triangle Pose (Parivritta Trikonasana)
Like Triangle Pose, Revolved Triangle Pose provides a deep stretch to the hamstrings and the side body. From standing, take a big step back, keeping feet on either side of an imaginary line, the front foot facing forwards and the back foot angled inwards at 45 degrees. Raise the arms out to the side, then twist the body so that the opposite hand comes to rest down on the front foot, and the other hand is raised to the sky, keeping the gaze on the upper hand.

Level 1. Leaning on the back of a chair with the opposite hand (if the left foot is forward, lean on the chair with the right hand), raise the other hand to the sky twisting the torso up in the direction of the hand.
Level 2. Leaning on the seat of a chair with the opposite hand, (if the left foot is forward, lean on the chair with the right hand), raise the other hand to the sky, twisting the torso up towards the hand.
Level 3. In the full expression of the pose, you can rest the hand that is not in the air on the floor, on a block on the floor, on the lower leg or even on the upper leg.
7. Intense Side Stretch (Parsvottanasana)
Intense Side Stretch is an intense hamstring stretcher, so if at any point you wish to bend the front leg, that's completely acceptable. From standing, take a big step back (a little less than you would for Warrior or Triangle Poses), keeping feet on either side of an imaginary line, the front foot facing forwards and the back foot angled inwards at 45 degrees. Bring the hands behind the back, either in reverse namaste or grabbing either elbow, keep the spine straight and hinge forward at the hips, gazing at the big toe.

Level 1. Lean on the back of a chair, keeping the spine straight as you hinge forward at the hips.
Level 2. Lean on the seat of a chair for a slightly deeper stretch.
Level 3. Place hands behind back hinging forward at the hips, sucking in the lower belly to get down as far as possible while keeping the spine straight.
8. Half Moon Pose (Ardha Chandrasana)
Half Moon Pose is a balancing pose which helps tone the legs, bum and abs as well as increasing balance. From standing, hinge forward at the hips while you simultaneously lift one leg straight out behind you. If the left foot is on the floor, place the left hand on the ground, raising the right hand up and twisting the torso towards the sky.

Level 1. Lean on the back of a chair and raise your leg out behind you to be parallel to the floor. The legs should make a right angle.
Level 2. Lean on the seat of a chair, and twist the torso and upper arm towards the sky.
Level 3. In the full expression of the pose, you can either lean on a block or the floor and/or, if there is too much pressure in the hamstrings, put a slight bend in the standing leg.
9. Hand-to-Big-Toe Pose (Utthita Hasta Padangusthasana)
This is another balancing pose to help practise your balancing skills while at the same time stretching the hamstrings. From standing, lift the knee up to the chest and with the same hand, grab the big toe, with the arm on the outside of the knee. Slowly straighten the leg, while keeping the back straight.

Level 1. Sit in a chair and lift the leg out in front of you, keeping it straight and holding it with both hands, as high as it will go.
Level 2. Wrap a strap around the foot, and, holding onto the strap, raise the foot up as high as it will go, whilst keeping the back straight.
Level 3. In the full expression of the pose, trying to keep the back straight and the shoulder back is important, so if you feel that your balancing skills are good but keeping the back straight is not possible, a strap is the way to go till the flexibility in the hamstring has improved.
10. Half Lotus Forward Bend (Ardha Baddha Padmottanasana)
Half Lotus is the way to go to be able to eventually get into full Lotus Pose. The Half Lotus Forward Bend stretches the hips and thigh muscles and also is a great stretch for the back. Starting in standing, bring one leg into a Standing Half Lotus. Hinging forward at the hips, go all the way down till the hands touch the floor, keeping the head loose so there is no tension in the neck.

Level 1. Sitting in a chair, bring one foot to rest on the opposite knee, resting your hands on the knees.
Level 2. From the Level 1 variation, bring your arms in front of the knees, leaning the torso forwards towards the floor.
Level 3. Leaning on blocks or props is fine for the full variation of the pose, just make sure the head is floppy so as to not put any pressure in the neck.
11. Eagle Pose (Garudasana)
Eagle Pose stretches the arms and legs, and helps improve balance. From standing, wrap the left leg around the right leg, keeping a bend in both legs, and then wrap the right arm around the left arm, keeping the gaze forward, and a bend in the knees. Hold for 3-5 breathes, slowly stand up, and then repeat on the other side.

Level 1. Sitting in a chair, put the left leg over the right knee, and the left elbow into the inside of the right elbow, bringing the hands together, back-to-back.
Level 2. Sitting in a chair, bring the left leg as far over the right knee as possible, tucking in the left foot inside the right calf. Then wrap the right arm around the left arm, bringing the palms together.
Level 3. Take it slow. First slowly wrap the left leg around the right leg, and bend the knees, like you're sitting in a chair. Then wrap the right arm around the left arm, bringing the palms together. Keep your balance by keeping your gaze on a stationary focal point.
12. Pigeon Pose (Kapotasana)
This beautiful pose helps stretch the hamstrings, thighs and spine. From Downward Dog, bring one knee forward and rest it in between the hands, and sit on the floor, keeping the back leg straight. Keep the torso straight and lift the foot higher up on the mat as and when it feels comfortable.

Level 1. Straddle a chair, keeping the back leg and torso as straight as possible.
Level 2. Bending the front knee, bring it to rest on the seat of a chair, keeping the back leg and torso as straight as possible.
Level 3. If you can't quite rest on the floor in the full expression of this pose, feel free to put a block or cushion under the bum.
13. Low Plank Pose (Chaturanga Dandasana)
This is the infamous Chaturanga Dandasana; the yoga half push-up. This pose tones up the arms, torso, legs and is pretty much a full body workout. You can get into a Chaturanga either from Downward Dog by bringing the body forward and slowly lowering the body down by bending the arms, but keeping the body straight, or by lying on the floor on your belly, and lifting the body up. The elbows should not come back past the body.

Level 1. Leaning on a chair, bend the elbows so that the body lowers down towards the chair, keeping the body straight. Another variation is to start by bringing the knees to the floor.
Level 2. From a lying down position, push on the hands and lift the torso, keeping the knees to the floor, and elbows by your side.
Level 3. In the full pose, try to keep the heels forward as opposed to leaning back into them. Keep the elbows by your side and remember to breathe!
14. Plough (or Plow) Pose (Halasana)
Plough is a great pose to do at the end of your yoga practice, and can be quite relaxing especially if you find the variation for you. It's a pose typically entered into from Shoulder Stand (have a look at our comprehensive guide to Shoulder Stands for beginners), and its benefits include relieving swollen legs and improving circulation.

Level 1. Lie down and bring the legs straight up towards the sky. Prop a block or cushion under your bum keeping the legs straight up, or slightly slanted inwards towards the head.
Level 2. Lifting the bum off the floor (using the hands on the lower back to help prop the bum up) place the feet on a chair, stool or the wall behind your head. You can keep the hands on the lower back for support, or if you feel up to it and for a better ab workout, put them on the floor.
Level 3. If you choose to put the feet on the floor behind your head, make sure you can breathe properly, as this is the most important thing. If the breathing is constricted in any way, lift the feet off the floor. Remember to take it easy, use props, straps, blocks, etc., whenever possible to ease yourself into poses. Be safe and above all, have fun!

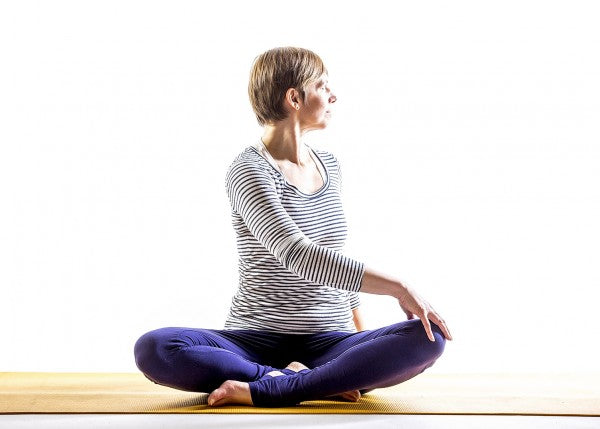
(Image via @expressionsbychristine)
Are you over 50 and do yoga? Do you have any tips for yoga over 50 you'd like to share with us? We'd love to hear from you!
Follow us for more free, high-quality yoga and mindfulness content... and subscribe to our mailing list below!
Don't forget to connect with us on social media (Facebook, Twitter, Instagram, Pinterest and Tumblr).